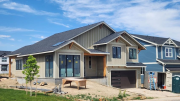
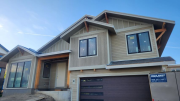
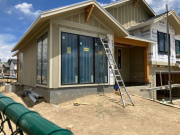
Larkspur
Click on photos to enlarge:
-
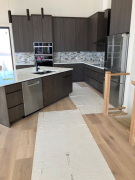
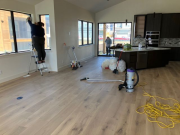
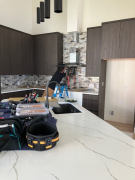
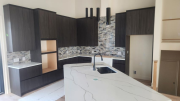
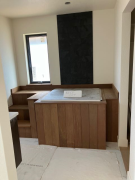
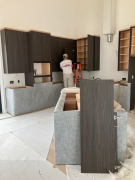
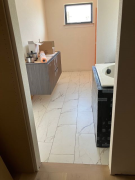
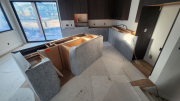
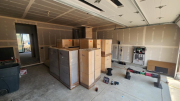
Completed kitchen
-

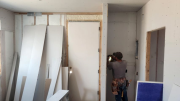
Barn door completed
-
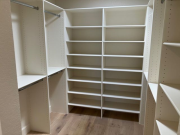
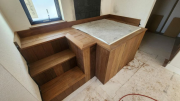
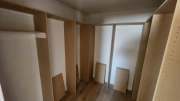
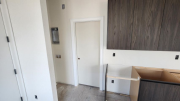
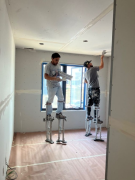
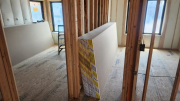
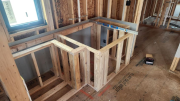
Custom closet completed
-
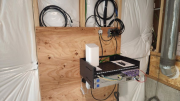
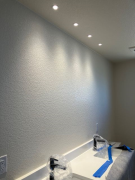
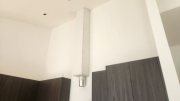
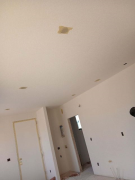
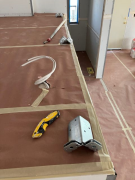
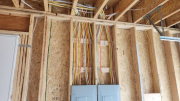
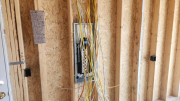
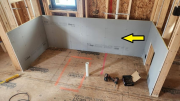
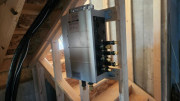
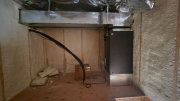
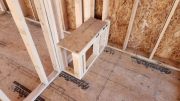
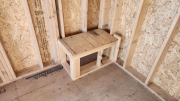
Low voltage center
-
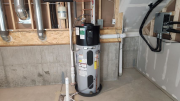
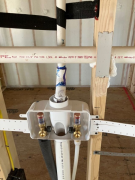
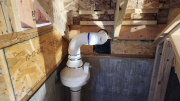
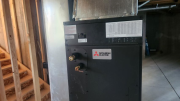
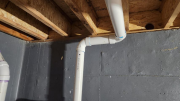
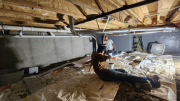
Hot water heater
-
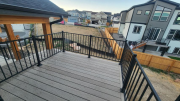
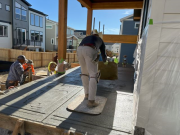
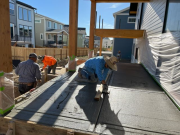
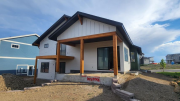
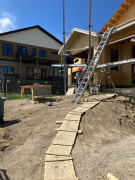
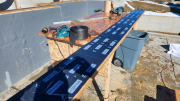
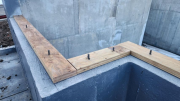
Deck and railing completed
-
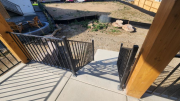
Rear porch railings
-
Stair railings on rear covered porch
-
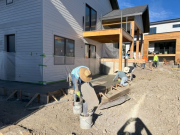
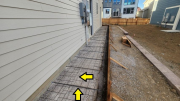
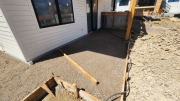
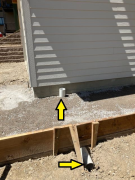
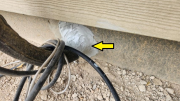
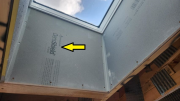
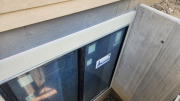
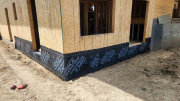
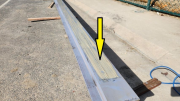
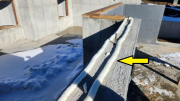
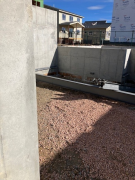
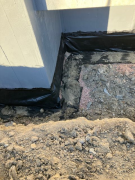
Downspout modification for better drainage control
-
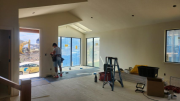
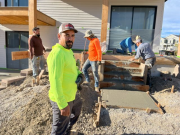
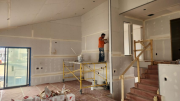
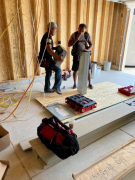
Crew handling final cleaning details
-
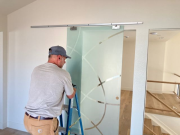
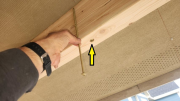
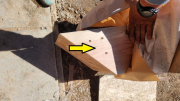
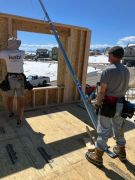
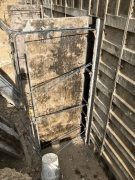
Jim adjusting barn door
-
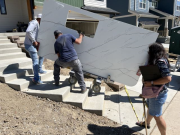
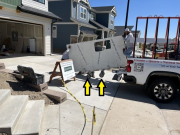
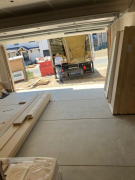
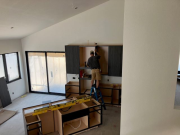
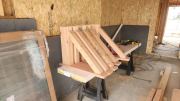
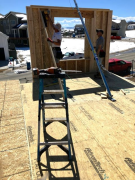
Wade and Jim bringing in glass barn door
-
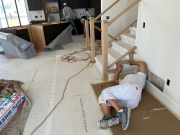
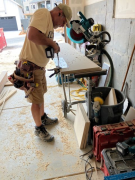
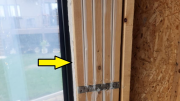
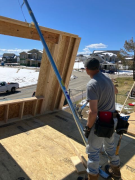
Wade installing door hardware
-
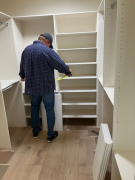
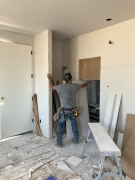
Wade installing shelves in custom closet
-
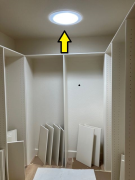
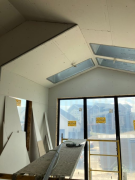
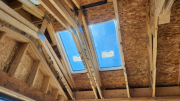
Velux sun tube brings in lots of natural light in primary custom closet
-
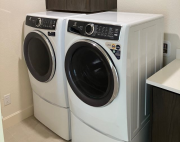
New washer and dryer installed
-
Range hood being installed
-
Kitchen cabinet protection has been removed
-
NRG Logic's final inspection
-
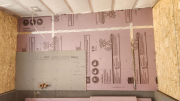
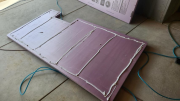
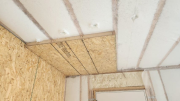
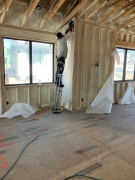
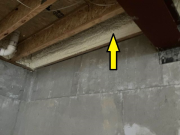
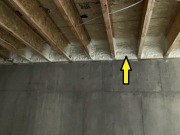
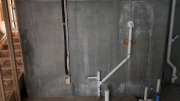
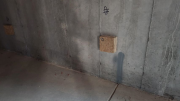
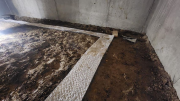
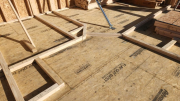
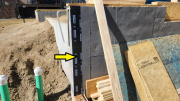
Insulation being installed over concrete walls in unfinished lower level
-
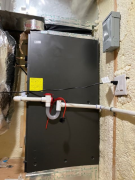
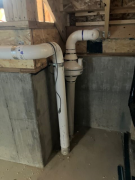
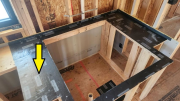
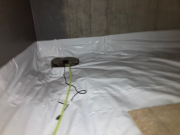
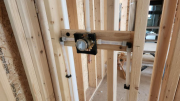
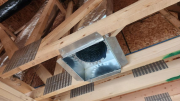
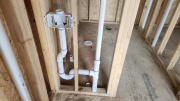
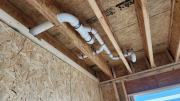
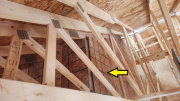
Special washer box adapter to drain attic HVAC equipment
-
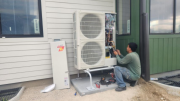
Heat pump equipment finalized
-
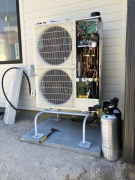
Extreme temperature heat pump
-
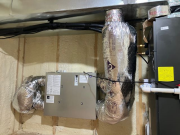
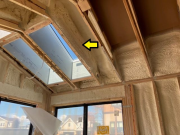
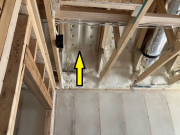
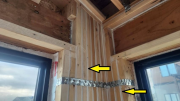
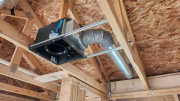
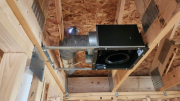
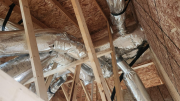
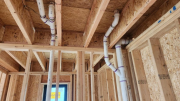
ERV in the insulated mechanical room in the attic
-
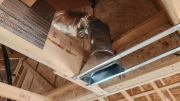
Air handler in the insulated mechanical room in the attic
-
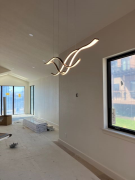
Shieko's wave light
-
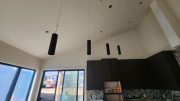
Kitchen pendant lights over island
-
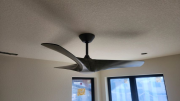
Ceiling fan in spare bedroom
-
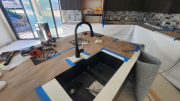
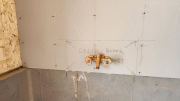
Kitchen faucet
-
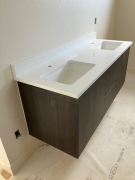
Primary vanity countertops with plumbing fixtures & lighting
-
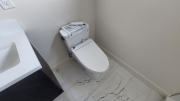
Primary toilet
-
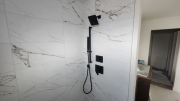
Primary shower valves
-
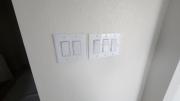
Electric switches are trimmed
-
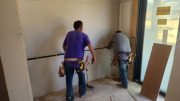
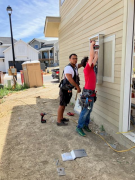
Electricians installing switches after house was painted
-
Painter, Maria, getting to the hard spots
-
Plumbing fixtures installed - tub is complete
-
IPE is responsibly harvested to provide a truly renewable resource
-
IPE is naturally resistant to rot & decay. Guaranteed for 20 years without preservatives
-
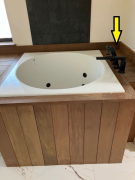
IPE, an exotic hardwood, tub deck installation in progress
-
Cabinets protection still in place
-
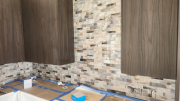
Kitchen tile backsplash
-
Accent tile behind soaking tub
-
Primary bath vanity & top installed
-

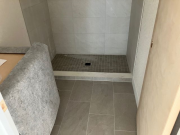
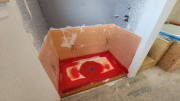
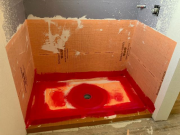
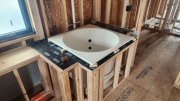
Primary shower base
-
Bath #2 grouted & cabinet protection in place
-

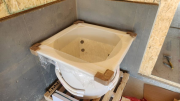
Guest shower base
-
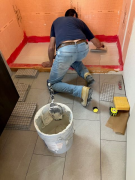
Laundry tile floor grouted
-
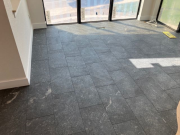
Solarium tile grouted
-
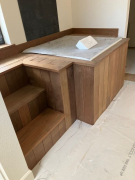
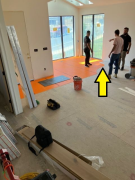
Kitchen shelves being installed
-
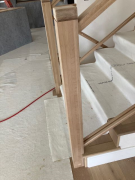
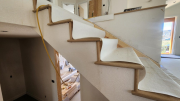
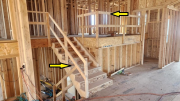
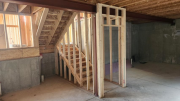
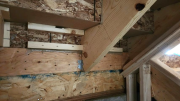
Details of handrail
-
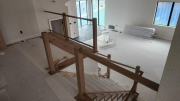
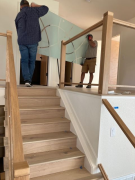
Interior railing in progress
-
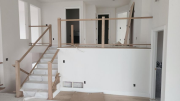
Interior railing work in progress
-
Almost to the top
-
Thank goodness for wheels
-
Easy as it goes
-
Shieko helping out the crew
-
Placing on rolling wheels
-
Very heavy - be careful
-
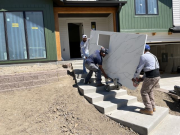
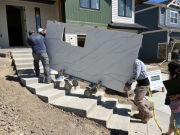
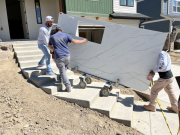
Unloading kitchen countertop
-
Shieko is happy the island countertop is here
-
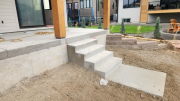
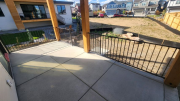
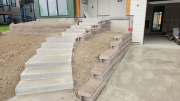
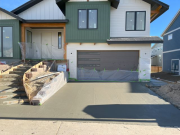
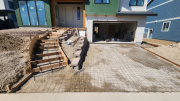
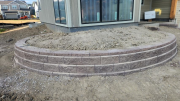
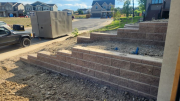
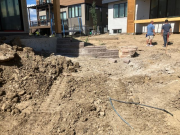
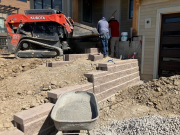
Upper patio steps & landing
-

Rear patio for study
-
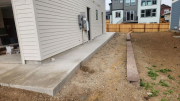
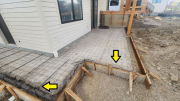
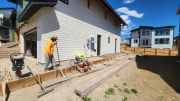
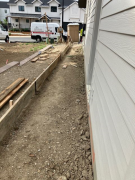
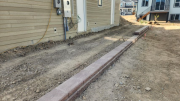
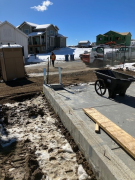
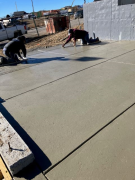
East sidewalk
-

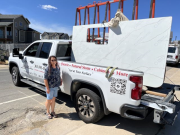
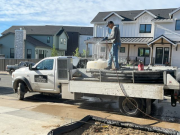
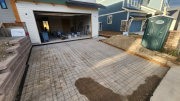
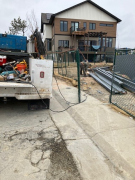
Driveway with protection sign
-
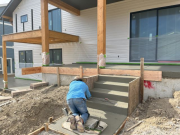
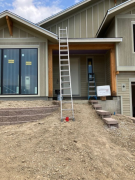
Entry stairs & landing
-
The finishing touch
-
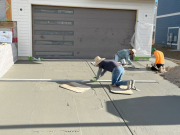
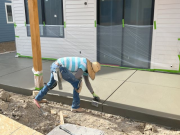
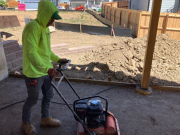
Applying light broom finish
-
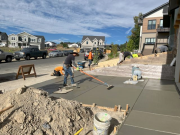
Doing the broom finish
-
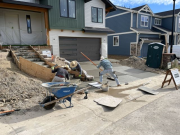
We got three beating the heat
-
How about this stretch balancing act
-
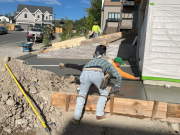
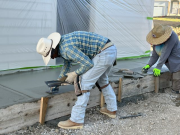
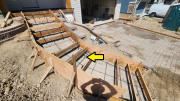
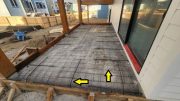
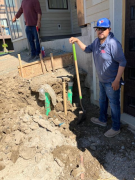
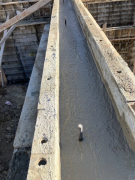
Creating the expansion joints
-
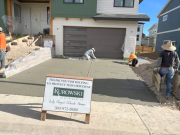
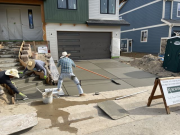
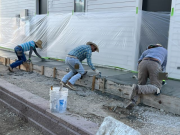
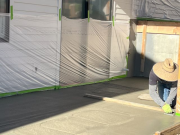
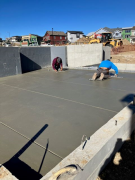
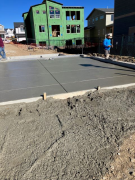
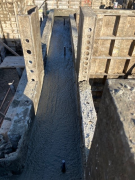
Starting the driveway finishing
-
Concrete waiting for finish work
-
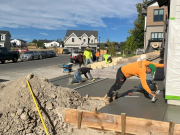
Now that is team work
-
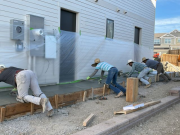
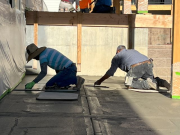
Three men of a 12-man team finishing the east sidewalk
-
Trowels in action
-
Finishing the edge
-
Finishing the lower patio
-
Finishing the lower patio
-
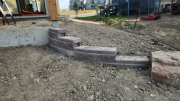
Finishing the steps
-
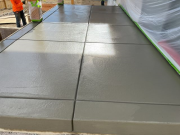
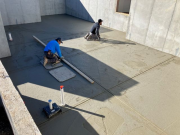
Upper patio finish
-
Upper patio finishing work in progress
-
Upper patio details
-

Finish work upper patio steps & landing
-
Finishing upper and lower patios
-
Cleaning the line pump truck
-
Tirzo - Owner, manager and a really good guy
-
An excellent trade partner
-
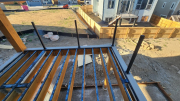
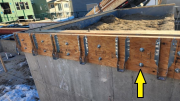
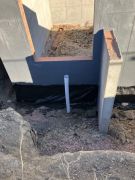
Deck railing posts are installed
-
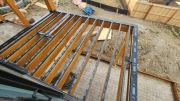
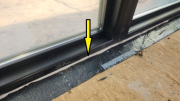
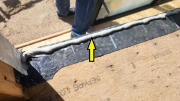
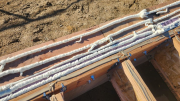
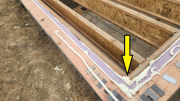
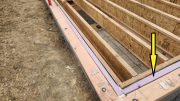
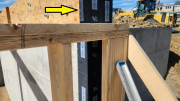
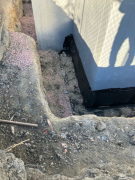
Deck is wrapped with Vycor flashing for moisture protection & longer durability
-
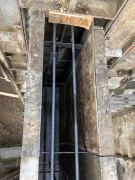
Stairs to front porch with steel rebar are formed
-
Stairs to front porch are formed
-
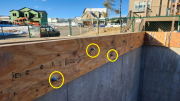
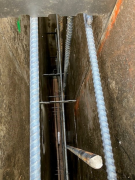
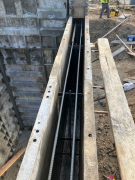
Steel mesh & rebar in back upper patio
-
Steel rebar & mesh in rear studio patio
-
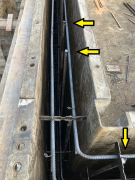
Steel rebar & mesh in east sidewalk
-
Steel mesh in driveway
-
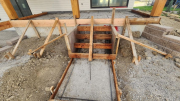
Back stairs are formed
-
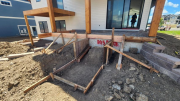
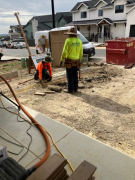
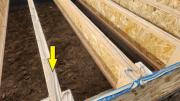
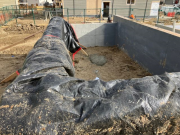
Wetting & compacting road base at rear lower patio
-
Road base under rear patio
-
Back stairs being formed
-
Setting forms
-
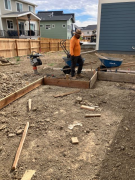
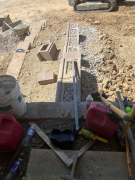
Concrete patio staked and string lined
-
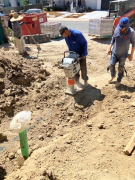
Concrete crew preparing east sidewalk
-
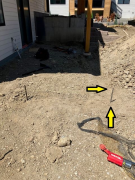
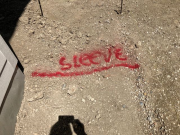
PVC sleeve to take drainage under sidewalk
-

PVC sleeve to take drainage under sidewalk
-
Sidewalk forms set
-
Sleeve location under sidewalk is marked
-
Sleeve location under sidewalk is marked
-
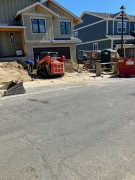
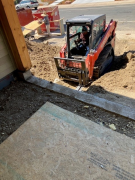
Driveway forms being set
-
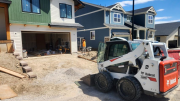
Concrete crew preparing driveway
-
Leveling clips are used for all tile installation
-
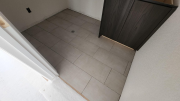
Laundry room floor tiles
-
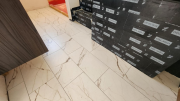
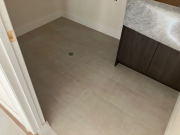
Primary bath floor tiles
-
Primary bath tile floor
-
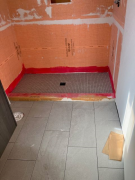
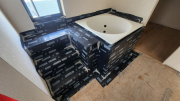
Tile shower base and floor
-
Marcelo applying tile mastic on Schluter shower pan
-
Studio shower niche
-
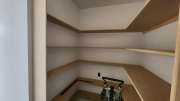
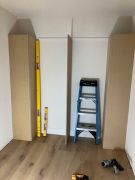
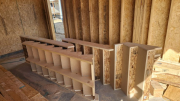
Pantry shelves
-
Primary closet adjustable shelves
-
Jim drilling for adjustable closet shelf pin
-
Doors, base, & hardwood flooring installed at upper bath
-
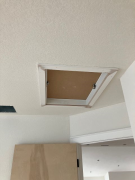
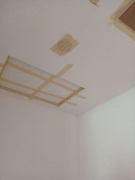
Attic access installed in secondary bedroom
-
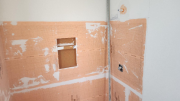
Closet bulkhead installed
-
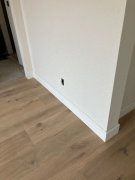
Baseboards on hardwood in primary bedroom
-
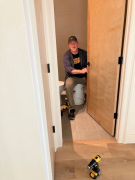
Jim installing baseboards
-
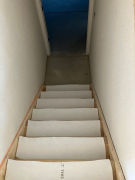
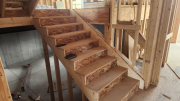
Stairs covered with protective material
-
Side of open stringer stairs
-
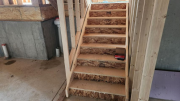
Hardwood stairs are finished and protected
-
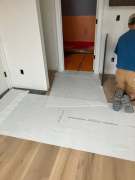
Protective floor covering in place
-
Kitchen floor covered with protective material
-
Finished floors are protected
-
Hardwood flooring will be installed at basement landing
-
Piano top layout between solarium & living room
-
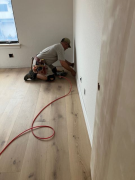
Installing hardwood floor in kitchen
-
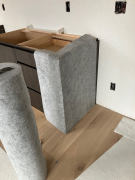
Protective cabinet material in place
-
Floor & base cabinets are wrapped with innovative reusable material for protection
-
Wall color options
-
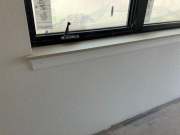
Window sills in place
-
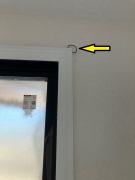
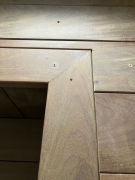
Beautiful corner miter with clamp
-

Upper floor doors installed
-
Doors on lower level installed
-
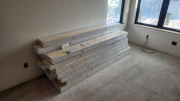
Delivery of doors & interior trim
-
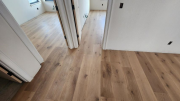
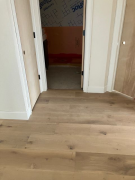
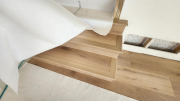
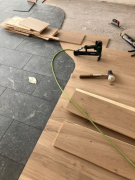
Wood floors installed on upper floor
-
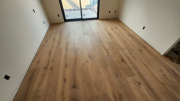
Wood floor in master bedroom
-
Wood flooring acclimating to temperature & humidity
-
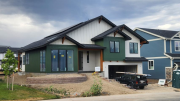
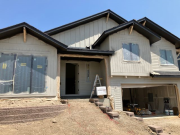
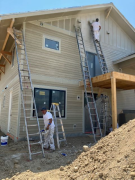
Front of house painted
-
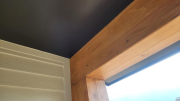
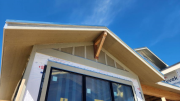
Finished front porch beams and soffit
-
Front porch beams finished
-
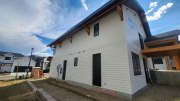
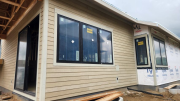
Exterior paint finished on east side
-
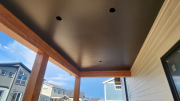
Patio soffit painted
-
Rear of the house painted
-
West side of the house painted
-
Soffits & fascia are painted
-
Prefinished gutter & downspout metal is selected
-
East side beams & brackets being clear sealed
-
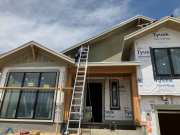
Priming exterior siding & trim
-
Caulking & priming
-
Tesla battery controller
-
Tesla battery in the garage
-
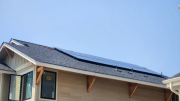
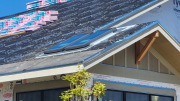
Solar panels installed
-

Solarium tiles are installed
-
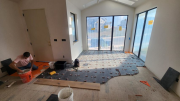
Tiles in solarium being installed
-
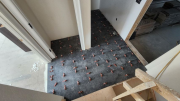
Hallway tiles installed with leveling clips
-
Schulter Ditra mat system in progress-Note the piano shaped radius
-

Installing Schulter Ditra mat in solarium & entry
-
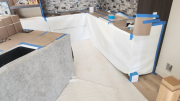
Tub deck waterproofed
-
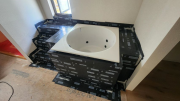
Tub deck protected with Vycor flashing
-
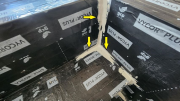
Vycor on tub deck and corners sealed
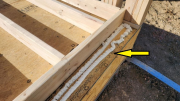
-
_thumb.jpg)
Soaking tub prepped for IPE (iron wood decking)
-
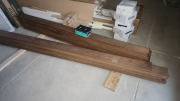
IPE wood for tub deck delivered
-
Shower Schluter system waterproofing
-
Shower pan & waterproofing system
-
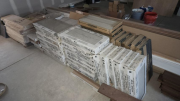
Tiles delivered
-
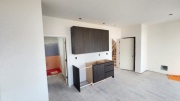
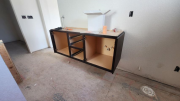
Cabinets in studio
-
Bathroom floating cabinets installation in progress
-
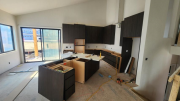
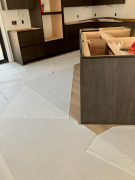
Kitchen cabinets installation in progress
-
Range hood chase installed on tall kitchen wall
-
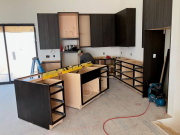
Kitchen cabinets being installed
-
Kitchen cabinets being installed
-
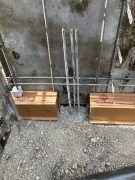
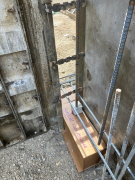
Cabinets delivered and stored in garage
-
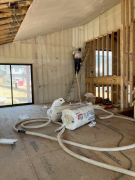
Sealing station holds & emits sealant under pressure at 100 PSI
-
Sealing station holds & emits sealant under pressure at 100 PSI
-
Fan and control box for monitoring of aero sealing
-
All penetrations sealed for AeroBarrier sealant application
-
All penetrations sealed for AeroBarrier sealant application
-

All penetrations sealed for AeroBarrier sealant application
-
All penetrations sealed for AeroBarrier sealant application
-
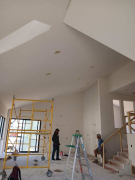
Drywall finishing crew
-
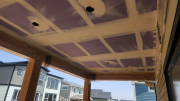
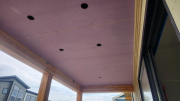
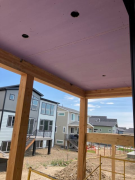
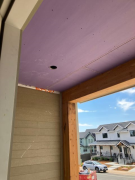
Exterior drywall taped and finish on rear porch ceiling
-
Drywall finished in kitchen
-
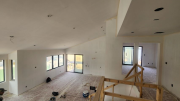
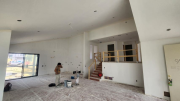
Drywall finished in great room
-
Drywall finished in solarium
-
Exterior drywall installed on porch ceiling
-
Exterior grade drywall on rear porch ceiling
-
Front porch exterior grade drywall ceiling
-
Mud applied to openings
-
Drywall finishing in primary bedroom
-
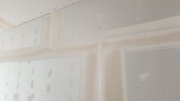
Drywall is taped
-

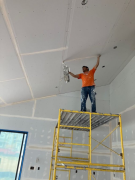
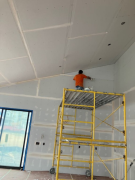
Tape being applied to ceiling
-
Tape being applied to ceiling
-
Tape application to walls
-
Safety rail post bases ready for install
-
Drywall installed in studio
-
Drywall at loft
-
Drywall in kitchen
-
Drywall crew taping
-
Drywall installed in solarium
-
Installing drywall in studio
-
Installing drywall
-
Installing drywall
-

Installing drywall in garage
-
Protective paper on garage floor
-
Window protective tape being installed
-
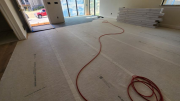
Floor protection for a cleaner floor in place
-
Drywall delivered
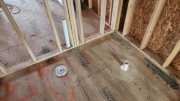
-
Special plumbing funnel for attic condensate drain
-
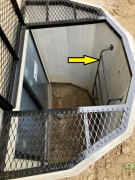
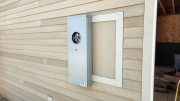
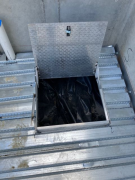
Egress cover with ladder and operable access
-
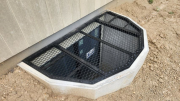
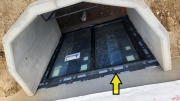
Window well covers are installed
-
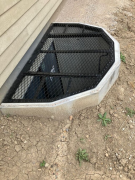
Window well covers installed
-
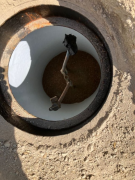
Proper yoke location
-
Interior cover in perfect condition
-
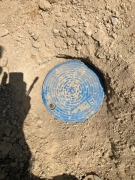
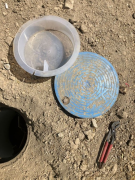
Meter pit cover un-damaged
-
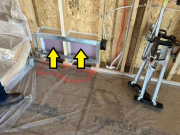
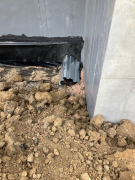
AC condenser line is sealed to foundation
-
Ladder in place for final roof inspection
-
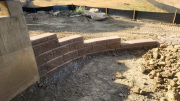
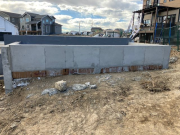
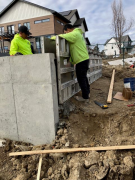
Round retaining wall by solarium
-
Retaining wall at back of house
-
Retaining wall at studio patio
-
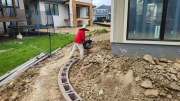
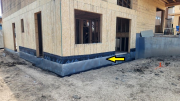
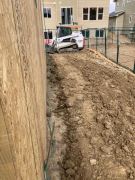
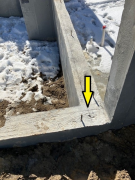
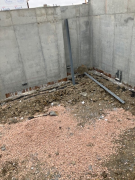
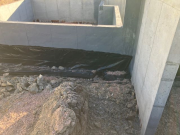
Retaining wall on east side for better drainage control
-
Entry retaining walls
-
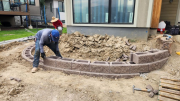
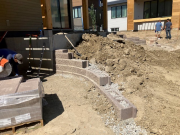
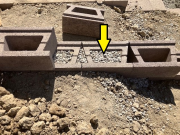
Retaining walls are build with locking blocks
-
Compaction around retaining walls
-
NW wall ending with boulder
-
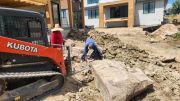
Large boulders were moved by tractor
-
Rear retaining wall in progress
-
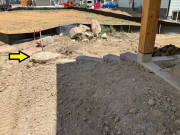
Small east retaining wall
-

Starting boulder placement for wall around solarium
-
Upper entry retaining wall completed with gravel
-
Lower wall completed
-
Level of blocks filled with gravel
-
Leveling gravel base with bars and granite fines
-
Placing gravel base
-
Gravel for wall base being unloaded
-
Compacting for wall base
-
Compacting for wall base
-
Cutting grade for lower front retaining wall
-
Cutting grade for lower front retaining wall
-
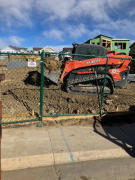
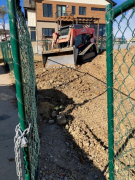
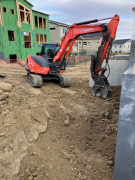
Start of retaining wall excavation
-
Hot cold faucet in garage
-
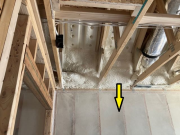
Additional insulation installed to protect heat ducts
-

Rigid insulation for heat returns behind wall
-
Rigid insulation to be sealed on garage wall
-
Extra insulated lid to protect plumbing drains in garage ceiling
-
Closed cell foam at rim joist between garage & house
-
Closed cell foam in garage wall to house
-
Closed cell foam in garage walls
-
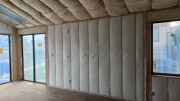
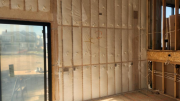
Walls are insulated with 2 inch closed cell foam & blown fiberglass
-
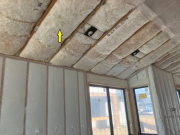
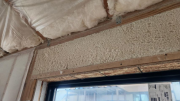
R-60 batt insulation up 8 feet in dining room ceiling
-
R-60 batt insulation in solarium
-
Walls in upper bedroom completed
-
Insulated kitchen wall
-
Walls in kitchen completed
-
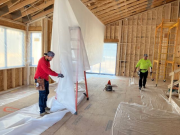
Starting fiberglass blown-in insulation in kitchen walls
-
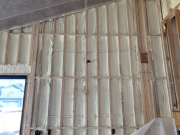
Netting on walls ready for blown-in insulation
-
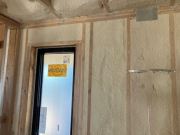
Netting in primary closet
-
Stapling netting
-

Stapling netting
-
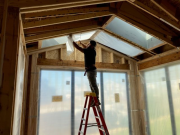
Installing netting protection over skylights
-
Hanging netting for blown-in insulation
-

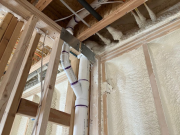
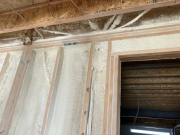
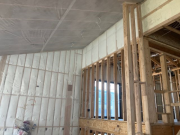
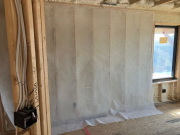
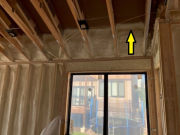
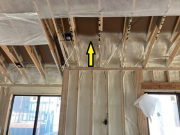
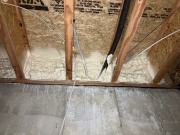
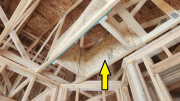
Attic walls are insulated with spray foam
-
Closed cell foam in walls
-
Closed cell foam in primary bath ceiling and walls
-
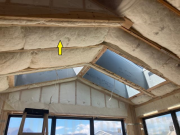
Four inches of closed cell foam around skylights and solarium framing
-
Seven inches of closed cell foam up two feet on exterior wall
-
Seven inches of closed cell foam up two feet on exterior wall
-
Seven inches of closed cell foam up two feet of the exterior walls upper attic to baffles
-
Closed cell foam at ledger box sill adjacent to garage wall
-
Headers are insulated with closed cell foam
-
Closed cell foam in door header
-
Closed cell foam in basement ledger
-
Closed cell foam in basement box sills
-
Insulation at return air inlet in family room
-
Windows reveals are framed and shimmed accurately
-
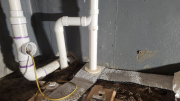
Plumbing in basement for future sink
-
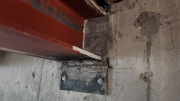
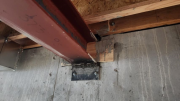
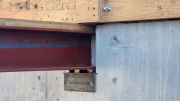
Steel beam pocket is grouted
-
Beam pocket blocked for grouting
-
Vent fan for lower basement floor
-

Crawlspace venting intake pipe
-
Crawlspace venting piping
-
Service lateral connected ready for meter
-
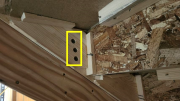
Fire stop foam at exterior outlets
-
Fire stop foam at exterior outlets
-
Tub protected with three-quarter inch plywood lid
-
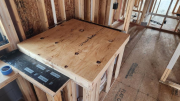
Soaking tub is installed in the deck
-
Soaking tub being installed
-
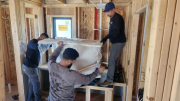
Soaking tub is delivered
-
Hardware & handles are installed on sliding doors
-

Sliding doors are shimmed
-
Floor heat registers are protected from dust
-

Bottom plates are caulked for maximum air infiltration control
-
Top plates are caulked
-
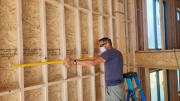
Framing is caulked for higher performance tight envelope
-
Framing multipacks are caulked for maximum air infiltration control
-
Hvac ducts are tested and sealed
-
Foam firestopping
-
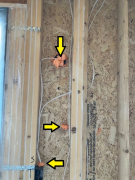
Wire penetrations are foamed for firestop
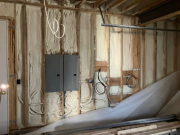
-
Wiring above breaker boxes
-

Breaker boxes wall in the garage
-
Electric trench connection in progress
-
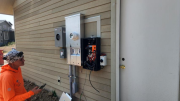
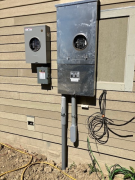
Electric meter housing outside of garage
-
400 amp panel being installed
-
Breaker box in garage
-
Electricians setting up the service panel
-
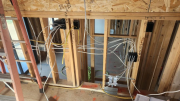
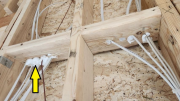
Wiring in kitchen
-
TV wiring in great room
-
Wiring for great room lights
-
Blocks in basement to hold electric outlets past insulation blankets
-
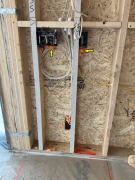
Wall to receive electrical panels in basement
-
Walls are checked with straight edge
-
Studs are shimmed before drywall for perfect wall
-
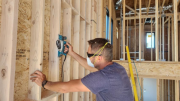
Pavel is shaving studs with planer for straight walls
-
DenShield used for skylights frame
-
Tub deck protected with Vycor
-
Master tub deck frame
-
DenShield behind tub deck was sealed
-
DenShield installed behind tub deck to hold insulation
-
Caulking in progress to tighten up stud spacing behind tub deck
-

Radon air barrier in upper crawlspace
-
Radon air barrier in upper crawlspace
-
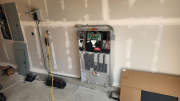
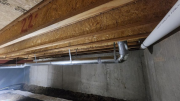
Heating equipment installed in basement
-
Heat pump air handler in basement
-
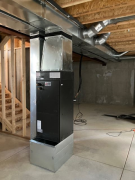
Basement air handler and duct work
-
Air handler in insulated mechanical room
-
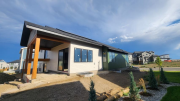
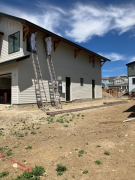
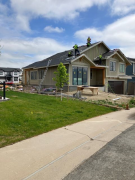
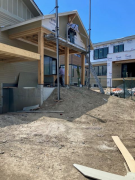
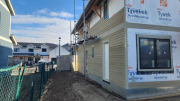
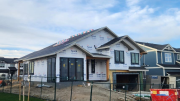
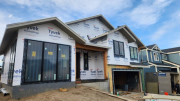
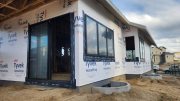
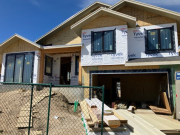
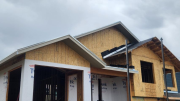
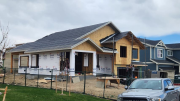
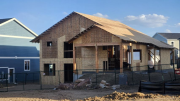
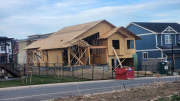
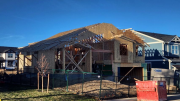
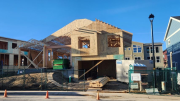
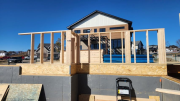
Front of house with roof finished
-
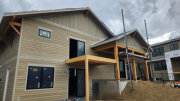
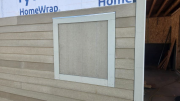
Front of house with siding finished
-
Siding almost complete
-
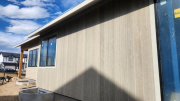
Vertical siding on west wall
-
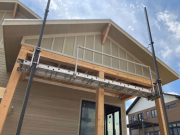
Board and batt siding on gables
-
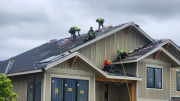
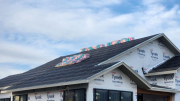
Roofers finishing roofing installation
-
Roofing in progress
-
Basement windows trimmed
-
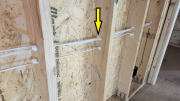
Hot water lines are insulated
-
Shower valves are installed
-
Master bathroom fan
-
Upper bath fan installed
-
Ceiling cold air return
-
Ceiling heat supply
-
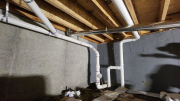
Plumbing, radon and duct below pantry
-
Radon mat system in crawlspace before plastic cover is installed
-
Radon pipe coming from studio crawlspace
-
Radon system below studio
-
Plumbing drain pipes in crawlspace below studio bathroom
-
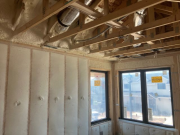
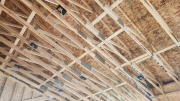
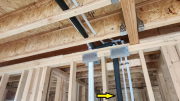
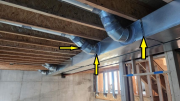
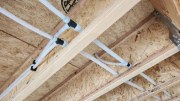
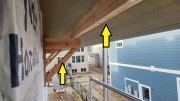
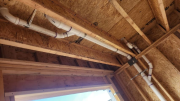
Attic ducts and main trunks are insulated
-
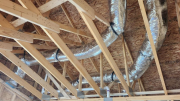
Insulated ducts above master suite
-
Heat duct below studio
-
Sealed ducts in crawlspace below studio
-
HVAC installers sealing ducts
-
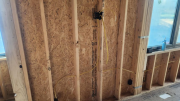
Foam at window gap for air infiltration control
-
Window gaps are filled with foam for air infiltration control
-
Rear of the house with siding finished
-

Siding at entry
-

Siding completed on east side
-
Horizontal siding on west kitchen wall
-
South gables in progress
-
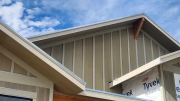
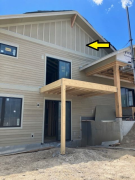
Rear porch gable board and batten completed
-
Rear upper gable with board and batten
-
Siding in progress on rear porch gable
-
Board and batten on solarium gable
-
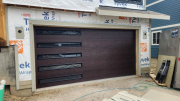
Garage door installed
-
Corbels below garage cantilever
-
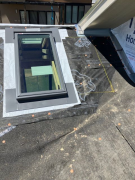
Solarium skylights from inside
-
Solarium skylights installed
-
Skylight flashed and installed
-
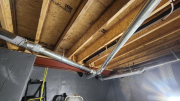
Sealed HVAC ducts for maximum airflow from heat pump
-
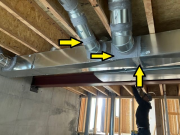
Sealing duct work for maximum airflow from heat pump
-
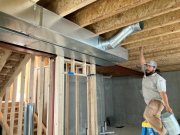
Very nice workmanship installing duct work for heat pump
-
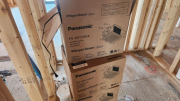
We use quiet Panasonic WhisperGreen Select fans
-
Laundry room plumbing
-
Plumbing vents
-
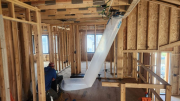
HVAC material stored in great room
-
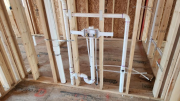
Best pex water lines and compression fittings
-
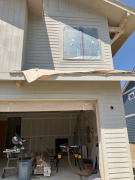
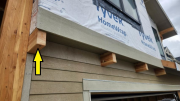
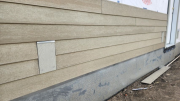
Siding being installed
-
Installing siding on east wall
-
We remove brick mold before installing trim
-
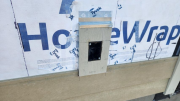
Outlet panels with flashing
-
Panels for electric outlets and disconnects
-
Window and trim flashings
-
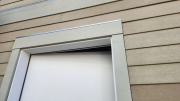
Window trim
-
Outlet blocks line up with siding lines
-
Special siding placement for electric panel
-
Window wells sealed against foundation
-
Vertical framing with weather barrier sealed to foundation in all similar locations
-
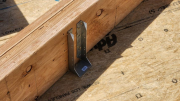
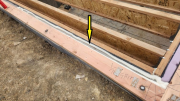
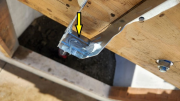
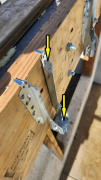
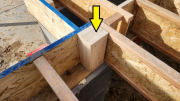
Deck ledger bolted & joist hangers are attached with screws for more secure fastening
-
Garage man door set in sealant
-
Plumbing drain lines in pantry
-
Studio laundry drain and vent line plumbing
-
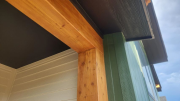
East soffit with beam and corbels
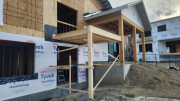
-

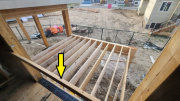
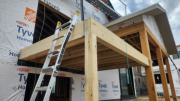
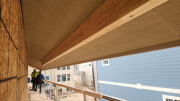
Deck perimeter built with solid glulam beams for extra stability
-
Deck beam is bolted to column for extra strength
-
Front of house
-
Roof shingles delivered
-
Upper bathroom plumbing
-
East soffit beam and supporting corbels
-
Master bedroom deck safety rail in place
-
Deck glulam beams and post
-
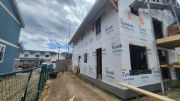
Front of house with exterior weather barrier
-
Basement window in window well with Vycor flashing
-
Back patio large sliding door
-
Deck is being built with glulam posts and beams
-
Plumbing drain lines in garage ceiling
-
Plumbing drain lines in studio ceiling
-
Exterior trim and windows
-
East soffit corbels bolted from backside
-
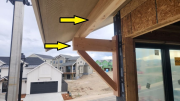
East soffit beam and corbel
-
East soffit glulam beam in place ready for corbel attachments
-
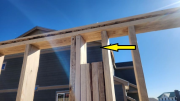
East soffit beam was bolted to each truss
-
East soffit corbels are prebuilt on table
-
Solarium window set in sealant
-
Solarium window to be set in sealant for maximum air infiltration control
-
Installing windows
-
Attic access with tall insulation barrier for cleaner access
-
Attic mechanical room ceiling and walls insulated with closed cell foam
-
Attic mechanical room walls insulated with closed cell foam
-
Basement steel beam shims are welded
-
Steel column welded to steel beam
-
Freshly placed caisson protected from rain
-
Concrete being placed in caisson hole
-
Caisson for deck has dried, steel in place
-
Caisson drill for deck post
-
Caisson staked for drilling to support the upper deck
-
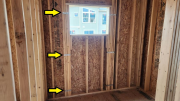
Post straps on side of window openings
-
Attic knee wall extended to 5-inch depth to receive insulation
-
Straps at top of posts for extra strength and stability
-
Fascias at front of house
-
Roof covered with high-quality underlayment-house is dried in
-
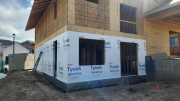
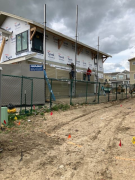
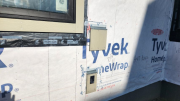
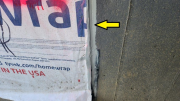
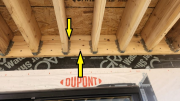
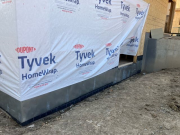
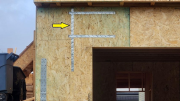
Starting house wrap
-
Ice & water shield protected with metal flashing
-
Backings for garage door installation
-
Garage door opening trimmed over Vycor flashing
-
Back of house protected with ice & water shield for future additional moisture control
-
Temp construction safety railings
-
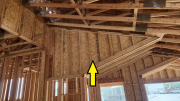
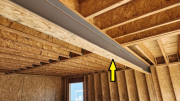
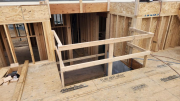
Upper stairs with LVL beams reinforcement for maximum stiffness
-
Basement stairs and walls
-
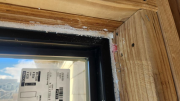
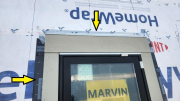
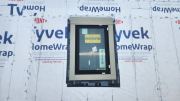
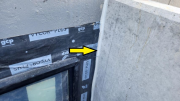
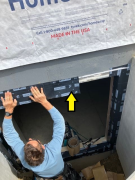
Window Vycor flashing before windows installation
-
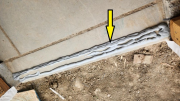
Flashing for extra moisture protection
-
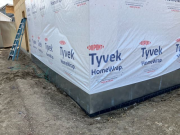
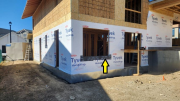
Tyvek & flashing for extra moisture protection
-
Vycor installation for basement windows for additional protection
-
Fascia & soffit insulation in progress
-
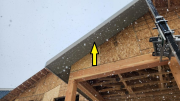
Another snow storm. Fascia soffit installation started
-
Master bedroom rake attic wall
-
Attic knee wall above master bedroom
-
Attic walls of mechanical room
-
Attic walls are sheathed to receive insulation
-

Attic knee walls between high and low ceilings
-
Stairs are protected from rain
-
Basement stairs installed
-
Bird mouth stringers
-
Side of stairs are bolted in the side walls for solid feel
-
Each stair stringer is hung on strap
-
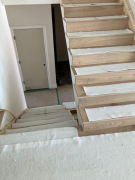
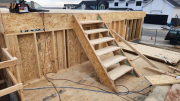
Middle stairs with open stringer installed
-
Upper stairs with open stringer installed
-
Steel beam plated
-
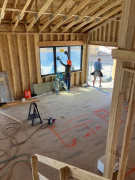
View from kitchen to solarium
-
Tall kitchen walls
-
Tall walls blocked 4' O.C. per engineering
-
Rake ceilings by entry
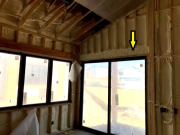
-
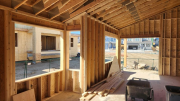
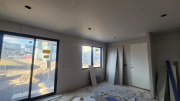
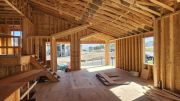
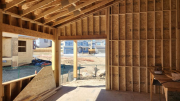
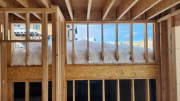
Windows in great room bring in lots of natural light
-
Ceiling underframe by entry
-
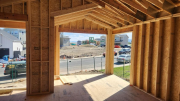
Front entry
-
Front porch ledger and trusses
-

Front of house
-
Front of house with front porch roof framed
-
Ceiling lines by entry and solarium
-
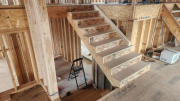
Stairs delivered
-
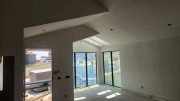
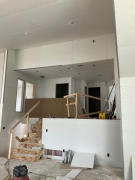
View from great room to solarium
-
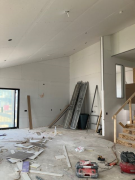
View from great room thru dining room looking north
-
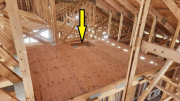
Attic mechanical room subfloor with access
-

Master bedroom attic knee wall will be insulated
-
Slightly sloped shower seat in upper bathroom
-
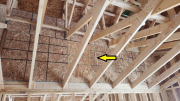
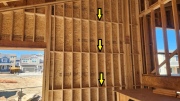
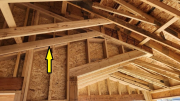
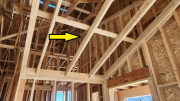
Trusses blocked for perfect drywall edge
-
Slightly sloped shower seat in studio
-
Back of the house with roof sheathed
-
Most of the roof is sheathed
-

Gables are permanently braced
-
Gable bracing
-
Rake master bedroom ceiling is under framed
-
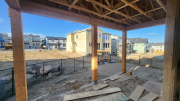
Rear patio beams & columns with bracing removed
-

Tall front rake wall being framed
-
18 foot tall kitchen rake wall is framed
-
Front entry wall being sheathed
-
Shape of house with roof trusses installed
-
Rear patio 9x12 glulam beams
-
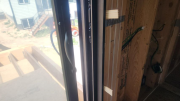
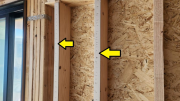
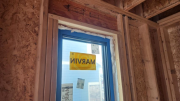
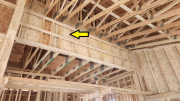
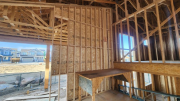
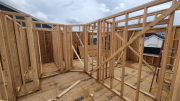
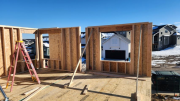
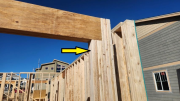
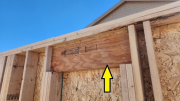
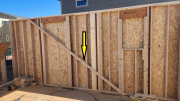
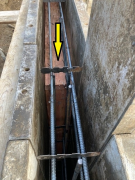
Strong LVL headers for future barn door in master bedroom
-
Roof gable overhangs (16 O.C.)
-

Roof gable overhangs are supported with 2x6 (16 O.C.)
-
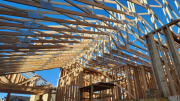
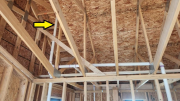
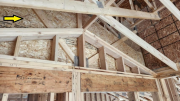
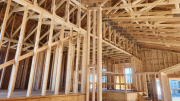
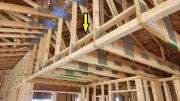
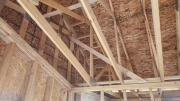
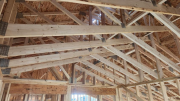
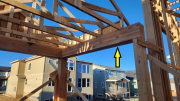
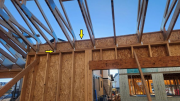
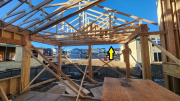
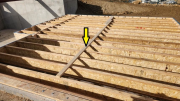
Roof trusses above great room
-
Trusses installed in great room
-
Trusses installed with hurricane clips and roll blocks
-
Future rear patio LVL beams, posts and trusses installed
-
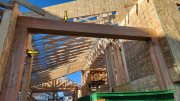
Entry massive glulam posts and beam
-
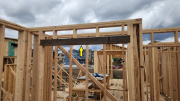
With roof trusses in place house is getting final shape
-
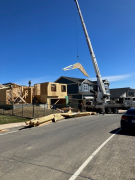
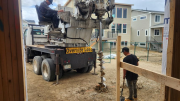
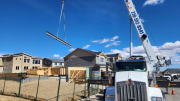
Cranes placing trusses
-
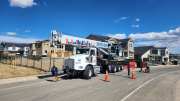
Crane setting up
-
Crane setting up
-
Walls in place awaiting trusses
-
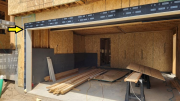
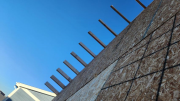
Garage header straps per engineering
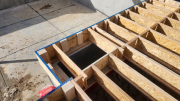
-
Top of upper interior walls with metal straps
-
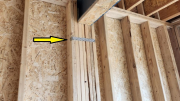
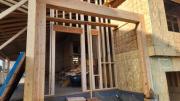
Strong LVL header for bypass door
-
Top plates of upper interior walls
-
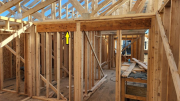
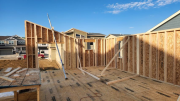
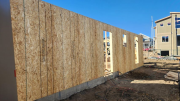
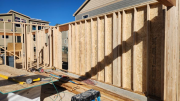
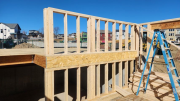
Interior walls on upper floor are framed
-
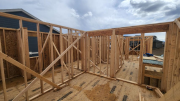
Interior walls in master suite
-

Epoxy rod and post base for 9x9 post
-
Rear patio 9x9 post are ready to be stood up
-
Patio post bases are epoxied upside-down
-
9x9 patio beams joints are cut and drilled
-
Gable trusses are prepared on the ground
-
Truss gables are sheathed on the ground
-
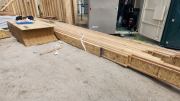
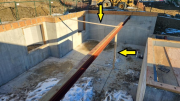
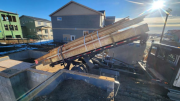
Glulam posts & beams for rear patio roof are delivered
-
Roof trusses are delivered
-
Roof trusses being dropped off
-
Upper walls in front of the house
-
Wall hold downs are nailed
-
Interior wall plates on third floor
-

Interior wall plates on third floor
-
Walls on third floor
-
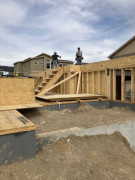
Master bedroom rake wall is stood up
-
Walkway built to house for a cleaner & safer job site
-

Master rake wall being stood up
-
Front walls on third floor
-
Long wall on third floor is stood up
-
Mid-level floor walls are stood up
-
Third floor front walls
-
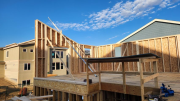
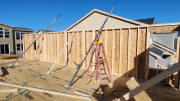
Large exterior walls on mid level are framed & sheathed on floor
-
After snow storm
-
Lots of snow in studio
-
Snow piles behind studio walls
-
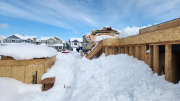
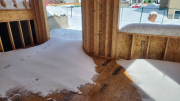
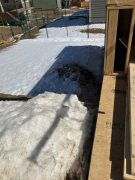
Main floor buried in snow
-
Bob removing snow
-

After the big snow storm
-
Master bedroom rake wall is framed
-
Big wall on third floor is framed and sheathed
-
Standing front bedroom wall
-
Standing front bedroom wall
-
Standing front bedroom wall
-
Multi-layer trimmers & posts are built on table for accuracy
-
Bob framing wall on third floor
-
Material is protected from elements
-
Third floor is sheathed
-
Safety railing around stair hole on third floor
-
Temp construction stairs
-
Safety railing around stair hole on second floor
-
Holes in blocks to insulate floor cantilever
-
Studio area is cleaned and braces removed
-
Paul insuring a tight subfloor
-
Bob applying glue for third floor subfloor
-
Paul and Bob laying out subfloor
-
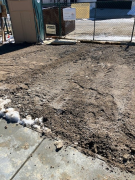
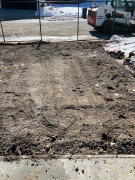
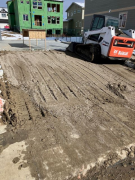
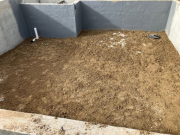
Grading the concrete areas
-
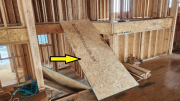
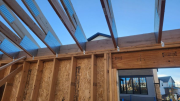
Upper floor LVL beams in place
-
Bob nailing joist hangers above studio
-
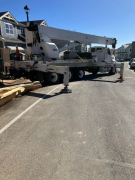
Crane placing garage steel beam
-
Crane set up with safety cones
-
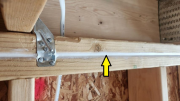
Beam hangers are nailed
-
Beam hanger above studio
-
Garage steel beam is plated on ground
-
Interior garage walls are sheathed for easy insulation installation
-
Upper floor material is delivered
-
Garage door is framed
-
Knee walls are braced
-
Pockets for garage steel beam
-
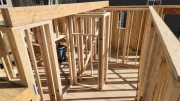
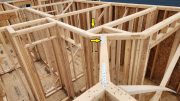
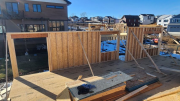
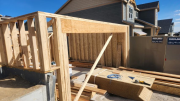
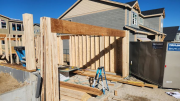
Studio interior walls are framed
-

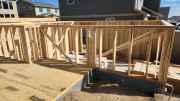
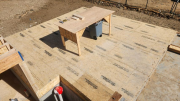
Massive 4-ply LVL beam above studio
-
Interior walls are connected with strap to keep exterior wall integrity
-
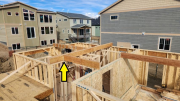
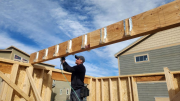
Long 3-ply LVL beam to be raised by crane
-
Walls are perfectly braced per string lines
-
Premium glue under steel beam plate
-
Lines for interior walls
-
Vertical framing foamed to foundation wall
-
Only steel column in basement is installed
-
Studio & garage walls are sheathed
-
Framed and sheathed garage walls
-
Massive posts under garage door header
-
Massive garage door LVL triple header
-
Vycor protection between foundation wall and framing
-

Connection for interior and exterior walls open for insulation
-
Superior LVL headers open for insulation
-
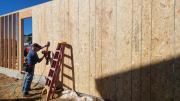
Bob nailing OSB on exterior walls
-
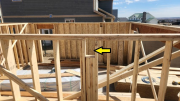
King studs & posts per structural engineer
-
Walls are braced before sheathing
-
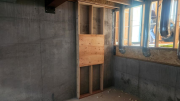
Knee walls between studio, basement & main floor
-
Knee walls between garage & main floor
-
Framed pocket for steel beam
-
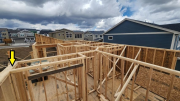
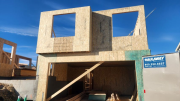
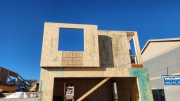
261Garage walls are framed
-
Exterior walls are stud on foam
-
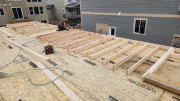
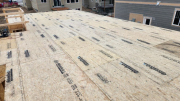
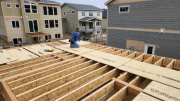
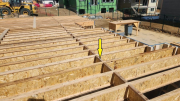
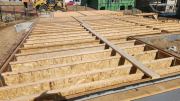
Advantech flooring installation on main floor complete
-
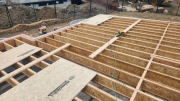
Advantech flooring being installed on main floor
-
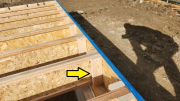
Glue & foam around floor ledgers for superior air infiltration control
-

Foam applied before floor sheet is installed
-
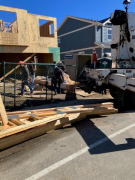
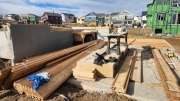
Wall material delivered
-
Spray foam over rigid foam block
-
Rigid foam block behind LVL ledgers
-
Spray foam under rigid foam block
-
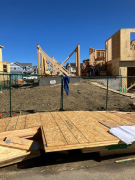
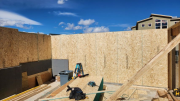
Studio floor sheathing is completed
-
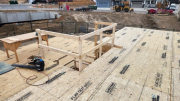
Main floor stair hole framed
-
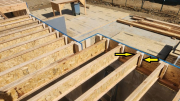
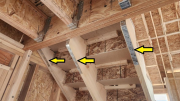
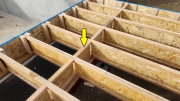
Main floor rim reinforced and squash blocks
-
Main floor roll blocks on top of steel beam
-
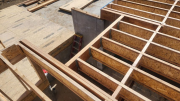
Main floor joists are braced
-
Staging area is clean and organized
-
Hangers coated with sealant to prevent floor noise
-
Hangers coated with sealant to prevent floor noise
-
Studio knee wall protected from concrete with Vycor
-
Ample amount of floor adhesive
-
We only use the best floor adhesive
-

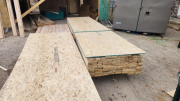
Advantech, a superior plywood floor, is used
-
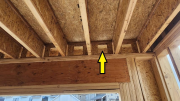
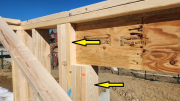
Strong blocks below heavy load points. We see this as very important
-
Roll blocks on top of steel beam
-
Parallel rim boards are reinforced with blocks
-
Floor rim is reinforced for roof loads
-
Crawlspace access is framed
-
Floor joists are braced before sheathing to keep them perfectly straight
-
Floor pack material in the future garage
-

Wall material delivered
-
Small steel beam under studio floor in place
-
Steel beam set in foundation pocket
-
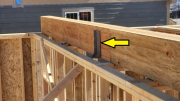
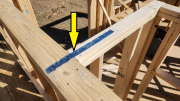
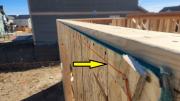
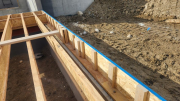
Three bolt pattern of LVL ledgers parallel to joist
-
LVL ledgers bolted with five-eighths bolts
-
Floor joists hangers on LVL ledgers
-
Long steel beam is plated & braced in place
-
Floor material being delivered to future garage
-
Long steel beam lifted by crane
-
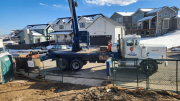
Crane to move steel beams
-

LVL treated plates installed in spray foam
-
LVL foundation ledgers protected with Vycor flashing
-
Sill plates installed using foam for superior air infiltration control
-
Superior LVL treated plates for a better framing system
-

Beautiful views from Louisville
-
Paul starting to plate foundation
-
Preparing to place special LVL plates
-
Locating the bolts to drill the plates
-
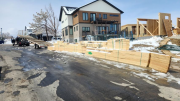
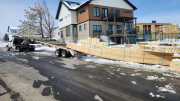
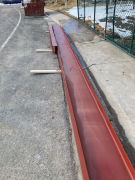
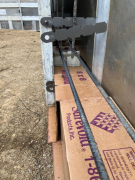
Plates & ledger lumber delivered after road base installation
-
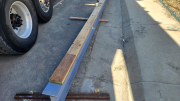
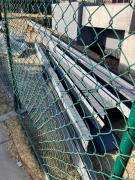
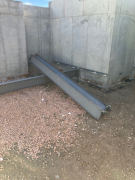
Steel delivered
-
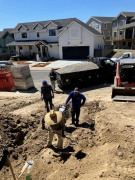
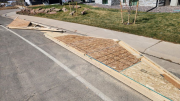
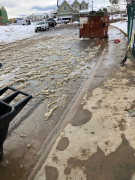
Chewy's man cleaning the street and sidewalks of the road base
-
Road base in place for staging area for mud-free deliveries
-
Road base in place for staging area for mud-free deliveries
-
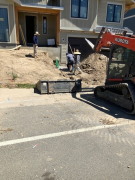
Spreading road base
-

Road base for staging area
-
Staging area setup in garage
-
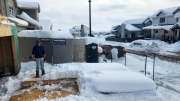
Parking area cleared
-
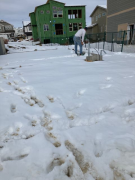
Paul shoveling snow off garage floor
-
Before snow cleared from parking area
-
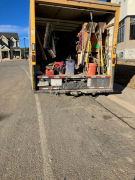
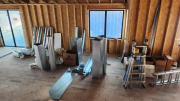
Professional organization of SW equipment
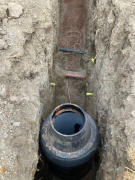
-
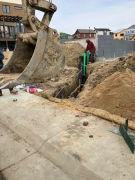
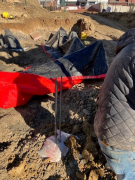
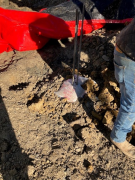
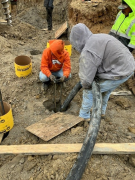
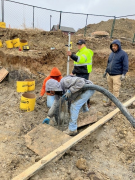
Installing new clean out risers
-
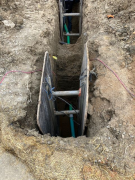
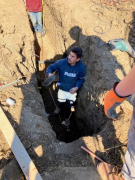
Shoring for new sewer line
-
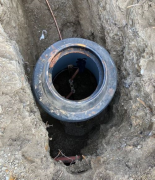
New meter pit & yoke
-
New water line under gas line
-
Installing new meter yoke
-
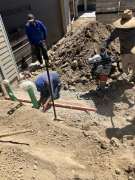
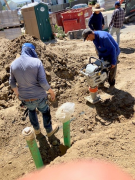
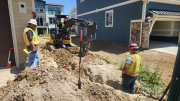
Starting trench for water line
-
Old curb stop riser box
-
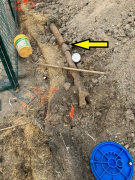
Cutting existing abandoned gas line
-
Gas line located before excavation
-
Exposing old curb stop box
-
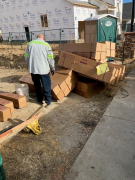
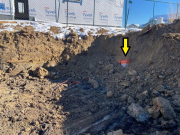
Debris left from FEMA cleanup
-
Foundation checked with laser & marked
-
Lines snapped for sill plates
-
Lines snapped for sill plates
-
Very minor rough spot removed
-
Final pass on garage floor
-
Concrete finishers for garage floor
-
Basement initial level and finish
-
First layer of concrete completed for garage floor
-

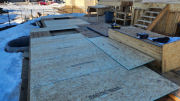
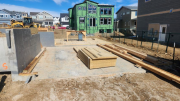
Ready for concrete
-
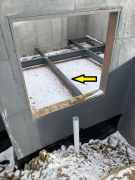
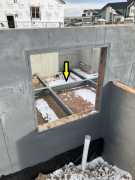
Access hatch
-
Membrane below structural floor mechanically fastened to the walls
-
Membrane below structural floor mechanically fastened to the walls
-
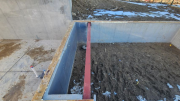
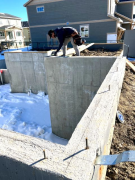
Rear patio walls complete & ready for backfill
-
Rear patio walls complete & ready for backfill
-
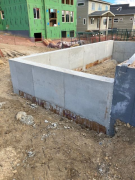
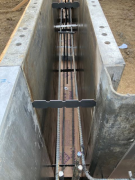
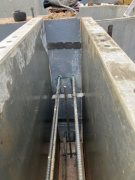
Corrugated steel in place - ready for concrete
-
Corrugated steel in place - ready for concrete
-
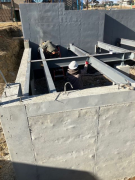
Basement ready for concrete
-
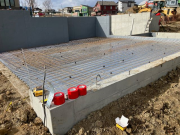
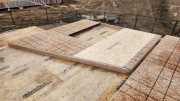
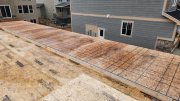
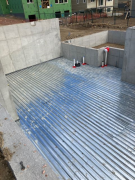
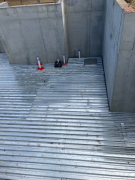
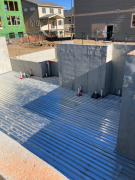
Steel mat in place for structural garage floor. Ready for concrete
-

Vapor barrier with sealed joints under garage structural floor
-
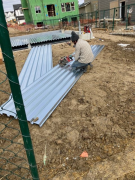
Cutting corrugated panels
-
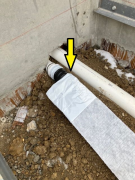
Radon connection basement to crawlspace
-
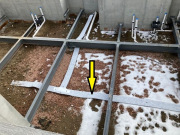
Radon mat system
-
Crawlspace leveled ready for radon & vapor barrier
-
Cleaned street & sidewalk per city code
-
Cleaned street & sidewalk per city code
-
Welding & painting welded areas garage structural floor
-
Steel beams for garage floor in place
-
Laser level top of wall
-
Rough top of wall gauge
-
Leveling rear wall
-
Using the vibrator to remove bubbles
-
Using the vibrator to remove bubbles
-
Moving concrete in the forms
-
Placing concrete for 2nd phase of rear porch walls
-
Installing 2nd phase of foundation forms
-
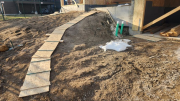
Grading backfill at entry
-
Grading backfill at entry
-
Backfill compaction
-
Backfill compaction
-
Drilling in anchor bolts
-
Installing window well
-
Lifting window well off the truck
-
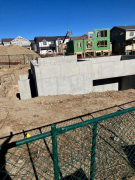
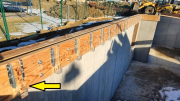
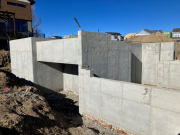
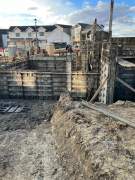
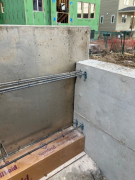
Beautiful finished concrete walls at front & entry
-
Garage & front entry
-
Structural steel floor in basement
-
Structural floor steel in basement
-
Structural floor steel delivered
-
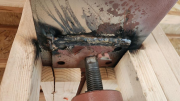
Basement main support beam
-
Beam supports being attached to the foundation wall
-
Beams & support members being welded
-

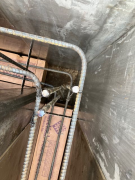
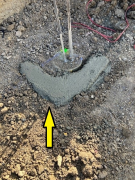
Checking for void collapse with rebar
-
Spoils cleaned out
-
Spoils from drain left in basement
-

Perimeter drain in garage around basement
-
Drain at northwest corner
-
Drain & riser at basement window
-
Drain and cover at front entry
-
Drain and cover outside crawlspace
-
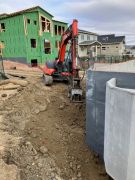
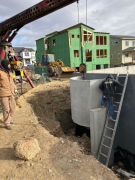
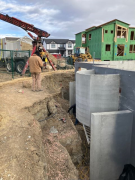
Sump pit in crawlspace
-
Corrugated steel over sewer pipe outlet
-
Insulation blankets over forms
-
Insulation blankets over forms
-
Concrete & anchor bolts placed
-
Concrete & anchor bolts placed
-

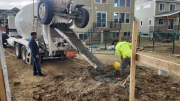
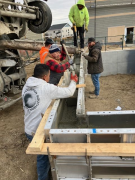
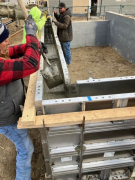
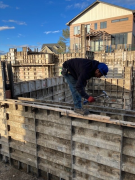
Concrete just placed into forms
-
Leveling & finishing top of foundation
-
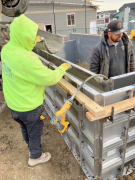
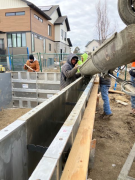
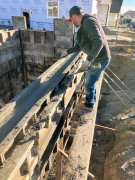
Pumping in progress
-
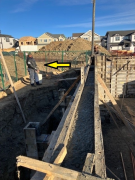
Pump operator using remote control filling forms
-
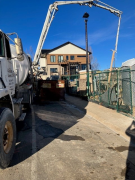
Pump set up
-
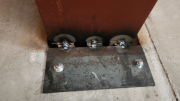
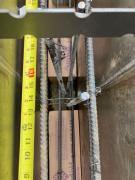
Wall height - 3 feet & 2 inches per plan
-
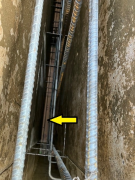
Vertical steel spacing
-
Vertical #4 at 4 ft OC or less
-
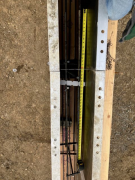
Steel splice well over the minimum 2 feet
-
NW corner wall steel
-
NE corner wall steel epoxied into existing concrete
-
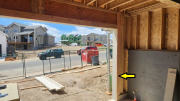
House to porch intersection
-
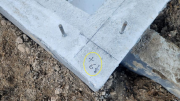
Corner caisson & wall steel
-
Center wall caisson
-
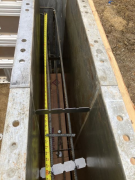
Bottom 2 - #4 bars above the void
-
Void at the bottom of the wall
-
Void material being delivered
-
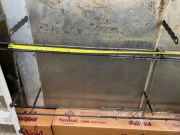
Wall reinforcing per engineer design
-
Vertical reinforcing bars
-
Reinforcing per engineered plans
-
Reinforcing per engineered plans
-
Reinforcing over wood window buck
-
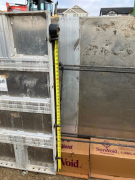
Reinforcing details
-
Reinforcing details
-
Reinforcing details
-

Reinforcing details
-
Reinforcing details
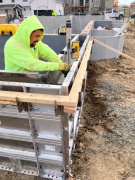
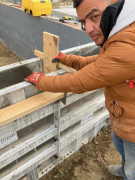
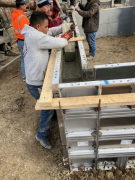
-
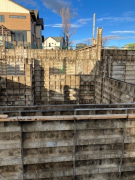
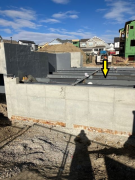
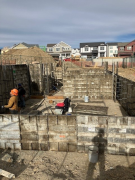
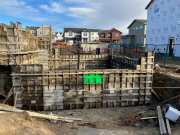
Forms set & ready to place concrete
-
Final pieces being placed in the forms
-
Reviewing wall heights
-
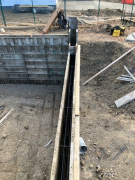
Exterior forms in place
-
Garage forms
-
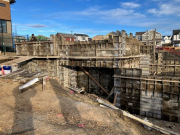
Foundation form placements in progress
-
Foundation form placements in progress
-

Form placements in progress
-
Forms being loaded into excavation
-

Intermediate support pads poured in place
-
Caissons & pads with steel
-

All caissons with steel poured in place
-
Corner caisson with support pads
-

Finished caisson top
-
Sonotube in place & finishing at proper elevation
-
Caisson tops covered with insulation & blankets for protection from cold
-
Caisson top before sonotube top set in place to prevent mushrooming
-
Placing concrete into drilled hole
-
Checking caisson elevation
-
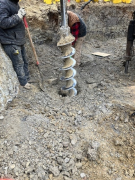
Drilled holes with steel in place
-
Cleaning spoils away from the hole
-
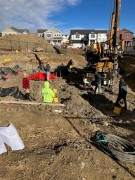
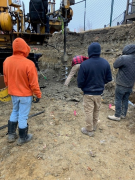
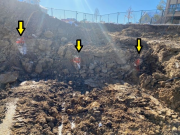
Caisson drilling in progress
-
Drilling caissons per soil engineer
-
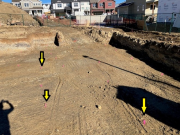
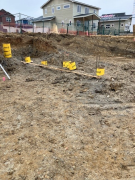
Excavation complete & caisson locations pinned
-
Excavation complete & caisson locations pinned
-
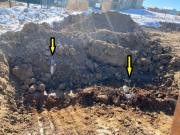
Caissons left in during demolition
-
Caissons left in during demolition
-
Caissons left in during demolition
-
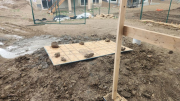
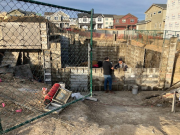
Soil from excavation stored on adjacent lot
-
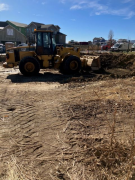
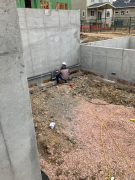
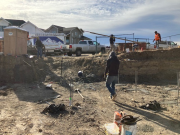
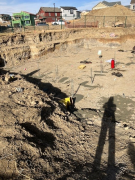
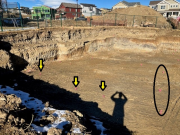
Excavation begins
-
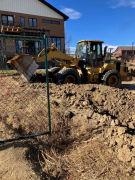
Excavation begins
-
Ramp into excavation
-
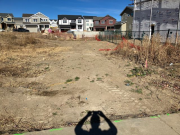
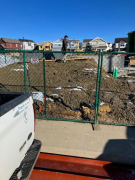
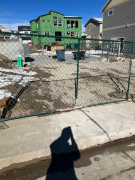
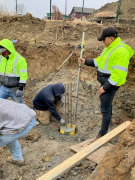
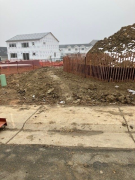
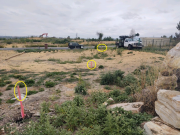
Lot staked
-
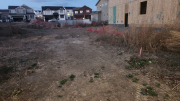
Lot clean by Paul & staking
-
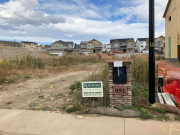
Lot before cleanup
-
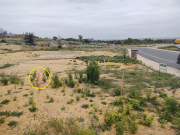
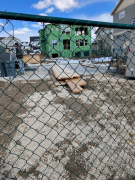
Lot staked for soils test
-
Lot staked for soils test
-
_thumb.jpg)
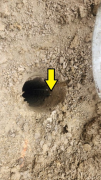
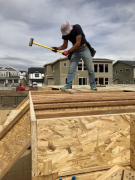
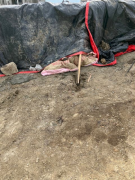
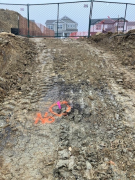
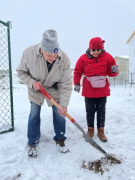
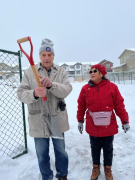
I broke ground! (Loud hurray & applause with gloves on)
-

Ground breaking
-
Maybe not!
-

Maybe!
-

But, let's see if it is for ground breaking of frozen ground
-
It's for digging around flowers & shrubs when the ground is not frozen
-
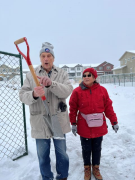
Oh, it even has instructions
-
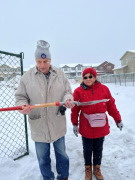
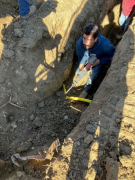
Groundbreaking
-

Thank you all for braving the cold & snow
-
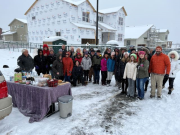
What a great group of friends
-
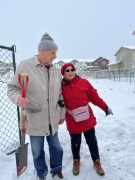
This is John, my builder
|